Mike Goldberg delves into simple sprite plotting
There is no doubt about it, all users of Acorn 32-bit machines are very fortunate people. How easy it is to take for granted the in-built desktop window system and the multi-tasking, to say nothing of the processing speed.
With all that power and an ability to display 256 colours on screen do we really need 24-bit graphics and a palette the size of Wembley stadium? Bigger does not mean better here or the more the merrier - in fact there's every colour you are ever going to need to recreate those of the visible spectrum.
Just like in the physical world where it is necessary to mix several colours to achieve the desired tint, the digital world provides analogous facilities like dithering for instance. All that and built in sprites and sprite Editor, namely !Paint. Armed with all that let's look at how simple it is to plot these sprites from where it matters - a Basic listing.
Before using !Paint to create a sprite we'll make one of our own from simple Basic commands. The listing Ball demonstrates how anything on the screen can be grabbed and made into a sprite.
These sprites use an area of memory already set by the computer and there are various ways of altering the amount of space required - use either the Task Manager from desktop or type in *CONFIGURE spritesize 32k after pressing F12, for example.
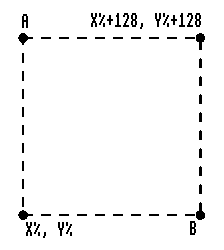
Lines 50-100 use the CIRCLE FILL command to draw a red ball with a white highlight which is going to be our sprite. Line 130 moves the graphics pointer to the bottom left corner of the image and line 140 sets a second pointer position at the top right of the image. The diagram (below) shows the how and what area will be grabbed while line 150 does the grabbing.
VDU 23, 27, 1, 0|
            |  |
            |  Sprite number zero (0-255)
            |
            Get sprite
This VDU command is equivalent to *SGET followed by the sprite number so line 150 could be:
*SGET 0
With the * commands you can give the sprites names instead of numbers for instance:
*SGET ball
but I find it is easier to manipulate numeric variables rather than strings and using a VDU command is often more versatile if less readable.
Line 180 the 0 after the 27 chooses a sprite - not really necessary here as having just got the sprite it is in fact the one currently selected but nevertheless it is good practice - and line 190 plots it. The plot codes &E8 to &EF act on sprites like all the plot actions and the remaining two parameters are the sprites X and Y screen position.
So what we have done is drawn an image on screen and captured it as a sprite and replotted it elsewhere on the screen as proof that we have grabbed it correctly. Right, hands up those of you who couldn't get the program to work?
Well it could be that you have your machine configured whereby there is no memory set aside for system sprites on power up - allocate at least 8k now - which is why having learned all about system sprites it comes as a bit of a disappointment to learn that it is inadvisable to use them.
By all means use them for yourself but do not expect everything you create on your own machine to work on everyone else's - a problem not just confined to sprites as all Arc owners know too well.
Consider carefully then whether you wish to continue learning the other system sprite related commands - like *SSAVE and *SLOAD - as explained in the User Guide or learning how to create memory space for your own sprites that everyone can use.
Listing II, DrawIt, is the answer to just about all the queries I had regarding plotting my own sprites and when you remove the REMs and empty lines there's hardly anything to it.
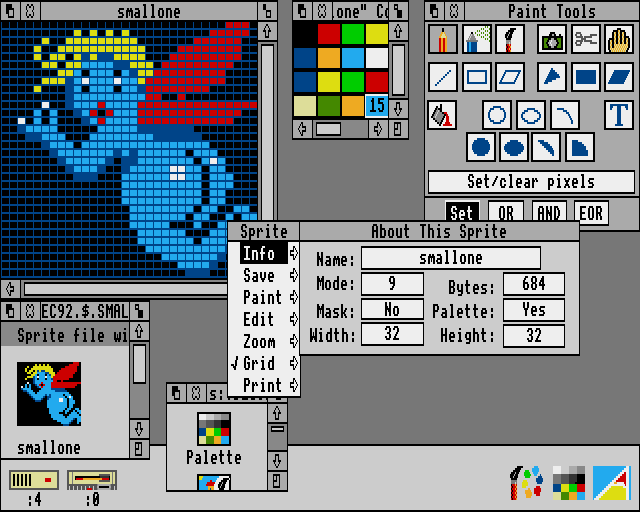
Let's say, just for example, you've created a Mode 9 sprite in !Paint called SmallOne and saved it to a spritefile called SmallFile on an ADFS disk titled Dec92 in the default directory $.
Now press f12, type in Basic, press Return and run the program. After the usual setting of screen mode and what have you, the first thing to do is load in the sprite(s) you have made - look at line 80:
80 sprite$ = "ADFS::DEC92.$.SMALLFILE"
Right, sprite$ is just the name we are giving to the file that we want information about. The rest is straightforward too, as long as the punctuation/syntax is observed:
Open quotation marks followed by ADFS which is the disk filing system followed by two colons. Then the name of the disk, a full stop, the dollar default directory the file is in, followed by another fulistop and lastly the name of the file containing the sprite(s) close quotation marks.
Sounds worse than it looks or actually is but care taken here will save you endless problems later as I found that, unlike Strike it Lucky, punching the monitor has an altogether undesirable effect on the screen. This string can get very long indeed if files are buried in several directories when the filepath name resembles that of a Welsh railway station.
Lines 100-120 looks at the file and works out its size, size%, so that the correct amount of memory can be reserved for the sprites. Line 160 DIMensions, that is sets aside, an area (area%) the required amount of bytes long (size%) and line 170 lets the first byte store this figure. Next line 210 initialises the area to load the sprite definitions to:
SYS "OS_SpriteOp",256+9,area%
SYS is a call from Basic to the operating system and the string following it tells us which part of the system that is being accessed. Get used to the 256+9 business - if you add the figures together you will obscure which command you are using - it's easier to remember 9 as the initialising bit rather than 265. Line 250:
SYS "OS_SpriteOp",256+10,area%,sprite$
loads the sprite definitions to the area allocated. That's the 10 after the 256 we are interested in and note the sprite$ filename pointer at the end.
O.K. we're nearly done, lines 270-280 are going to be the sprites x y coordinates and line 290 is how we plot the sprite to the screen which for the most part acts like the old GCOL first parameter. Now let's plot the sprite (see above) - yippee!
That's it! Printed quick enough to rule out nearly all need for machine code and it can be printed even quicker than this. Next month we will see how easy that is along with masks and other easy to use sprite operations that have been previously difficult to lay your finger on - now you know where to look!
Click here to download the example files for this article
| Source: | Acorn Computing - December 1992 |
| Publication: | Acorn Computing |
| Contributor: | Mike Goldberg |